<img height="1" width="1" style="display:none" src="https://www.facebook.com/tr?id=1154466707949783&amp;ev=PageView&amp;noscript=1">
Labeled dieline template for a stand-up pouch showing front panel, back panel, gusset, and bleed areas. If there are realistic pouches in the image the pouches should have some design elements as though you might find them in a grocery store. Use the fictitious company Mind+Body as the brand and label the products with real products that would be packaged in the pouches. Do not use Lorem Ipsum copy in the graphic.

How to Design Your Stand-Up Pouch: Tips for Layout, Branding & FDA Compliance

Learn layout essentials, branding best practices, and regulatory tips to get your pouch design right the first time.

ESTIMATE MY PROJECT COST
Diagram of stand-up pouch anatomy labeled front panel, back panel, bottom gusset, and side gussets.

1. Understand the Pouch Layout: Front, Back, Gusset, and More

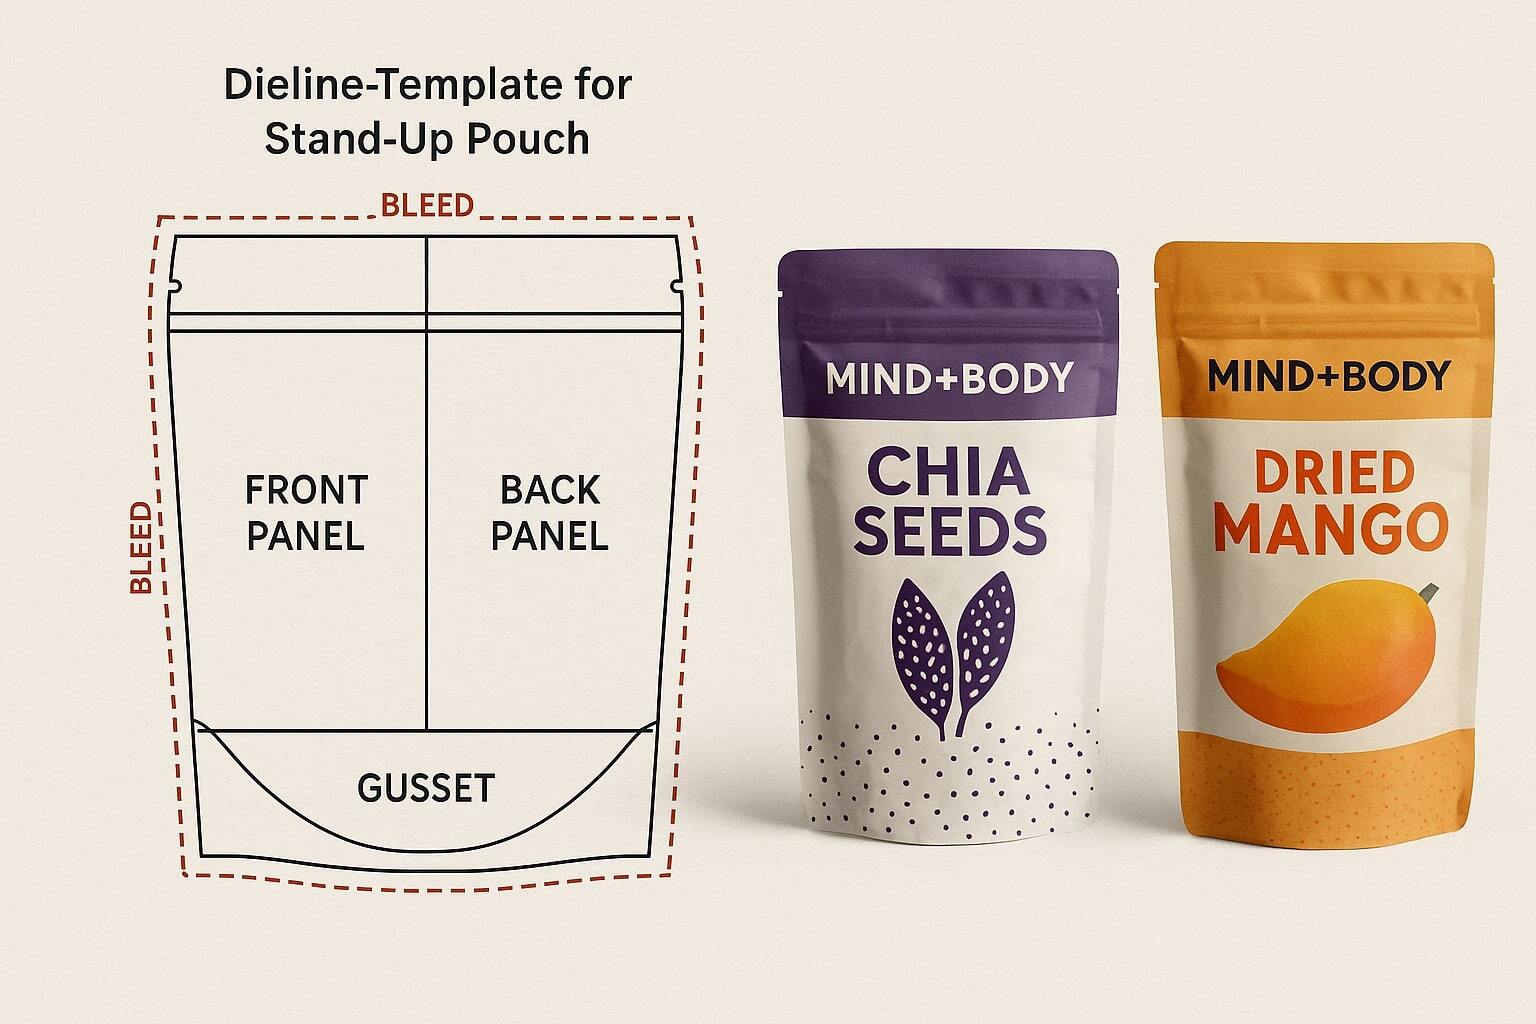
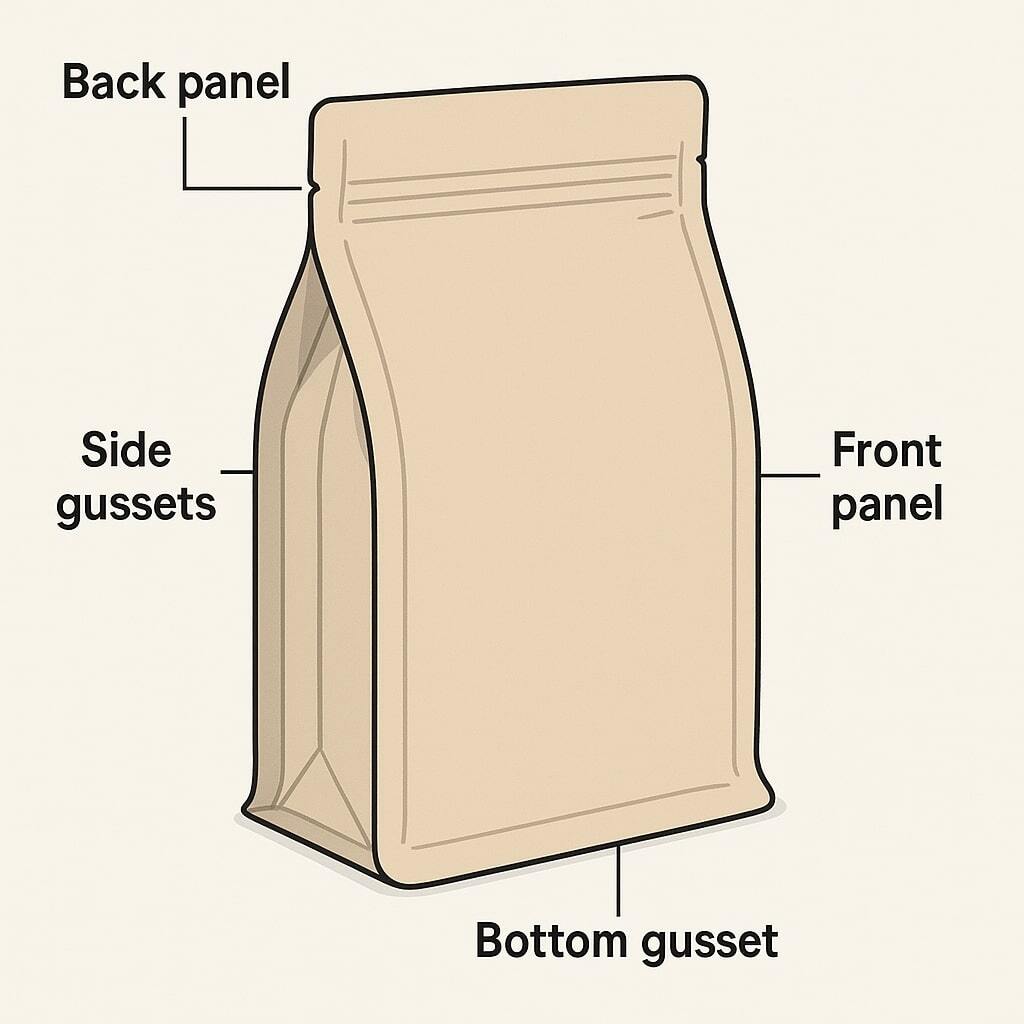
Get familiar with your pouch’s anatomy before designing: front panel for branding, back panel for instructions, bottom gusset for stability, and side gussets for volume.

Request Your Free Pouch Template →

2. Branding: What Belongs Where?

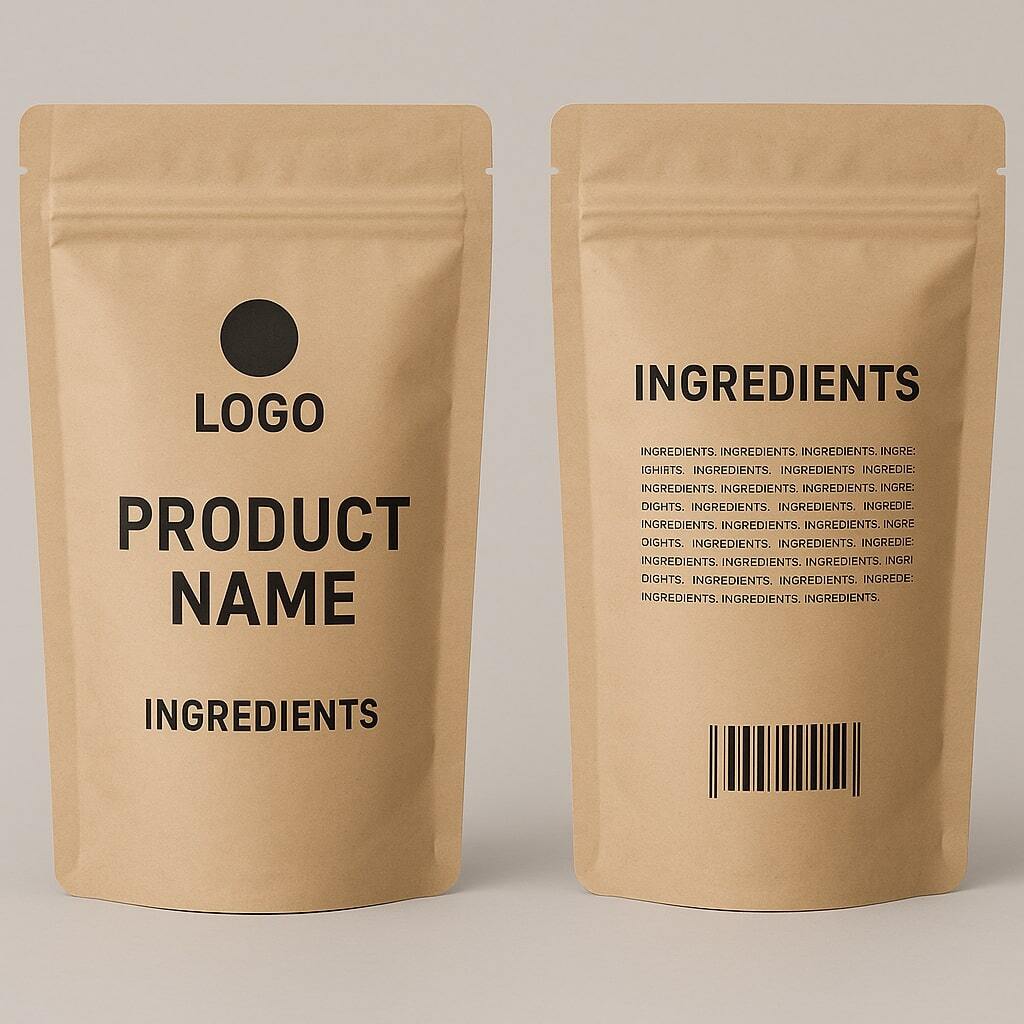
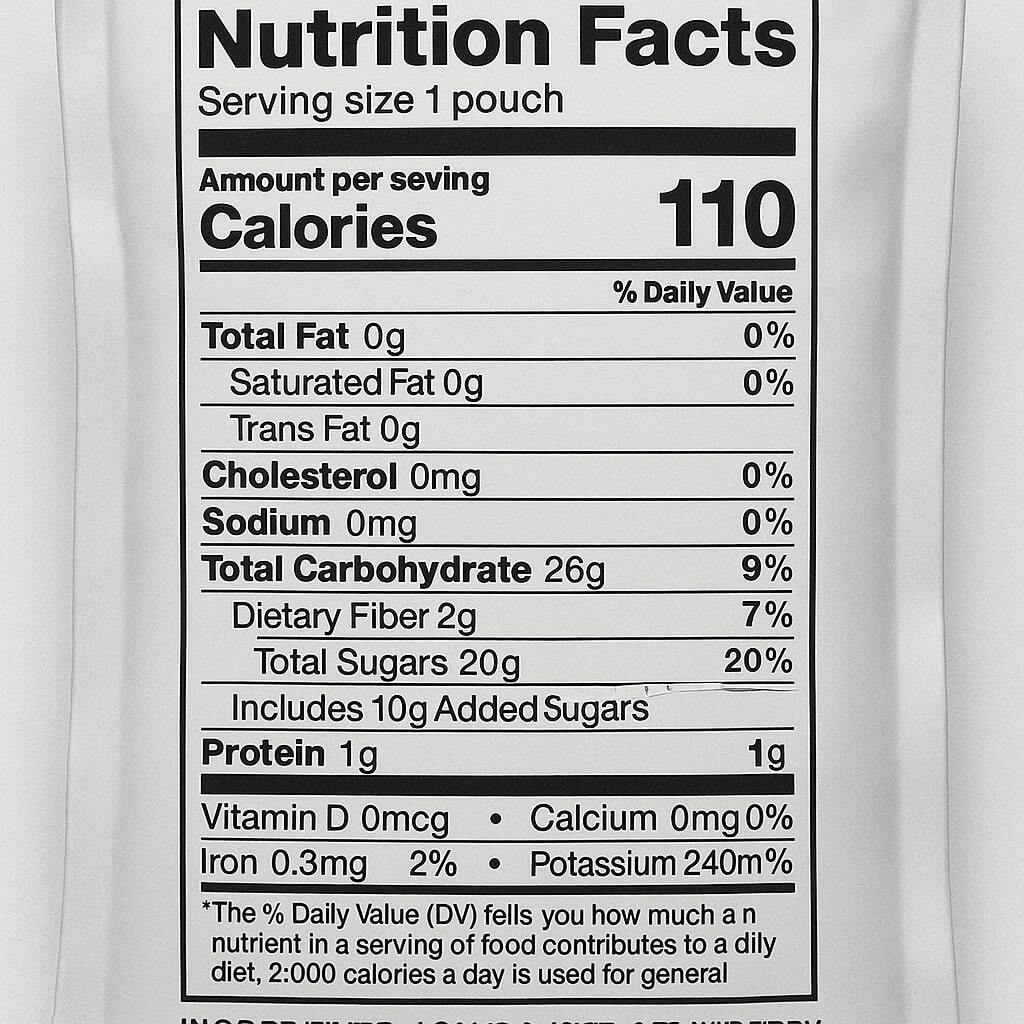
Front panel must include product name, brand logo, and a key benefit. Back panel for ingredients, instructions, barcode, and certifications.

Mockup showing front and back of a pouch with branding callouts for logo, product name, ingredients, and barcode.
Close-up of FDA nutrition facts panel and ingredient list on the back of a food pouch.

3. FDA & Regulatory Compliance: Don’t Skip This

  • Nutrition Facts Panel
  • Ingredient List
  • Net Weight
  • Manufacturer Info
  • UPC Barcode

4. Design File Setup & Artwork Submission

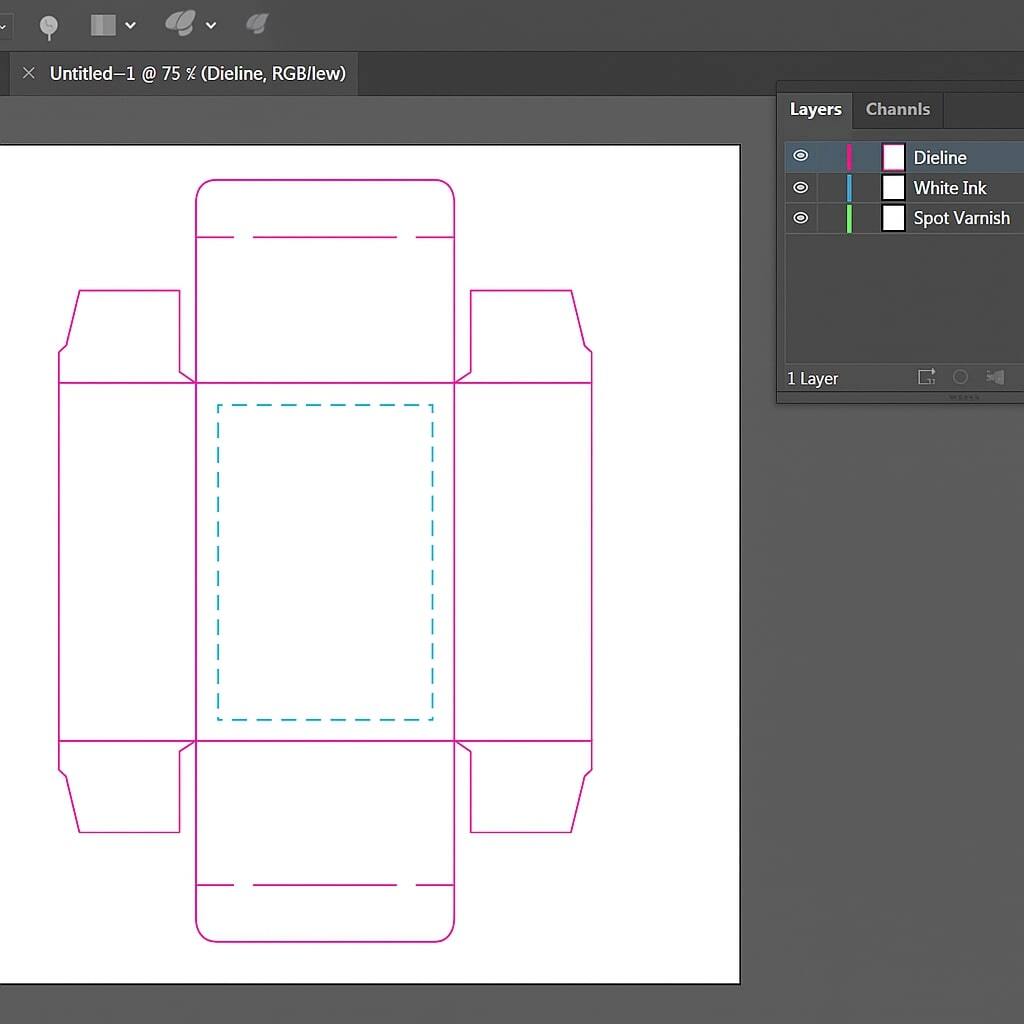
Submit AI files in CMYK, 300 dpi, with outlined text, separate dieline and varnish layers, and linked images.

Download our Artwork Setup Guide →

Screenshot of an Adobe Illustrator dieline file with layers labeled for dieline, white ink, and spot varnish.